This post does not include any sponsored links or promotional content and is based solely on my experience of use.
Update July 2022. In the 5.0.0.1 update of the plugin we added the automatic CDN configuration feature for a much simpler and faster setup of QUIC.cloud CDN.
A Content Delivery Network or CDN is a network of servers around the world that stores copies of your content and delivers it from the server closest to the visitor's country of origin.
This, broadly speaking, in addition to easing the load on your server, by expanding the bandwidth with more and better resources, significantly improves the speed of your site.
Do I need it?
The best answer to this, as always, is it depends. You can contemplate using CDNs if the answer to some of these questions is yes.
- Do you already have a lot of content and do you host and serve a lot of images, graphics, etc.?
- Do you regularly receive enough traffic from other countries on different continents?
- Is your website slow?
Although there is no absolute answer and you will have to assess whether you need it depending on the circumstances of your blog, you should also know that if your site receives little traffic, the use of CDN can be detrimental to you. Here is the explanation.
The last CDN I used was Cloudflare and the truth is that it didn't convince me, some options that promised performance improvements actually had the opposite effect.
Reverse proxy CDN
Like Cloudflare, QUIC CDN is also a reverse proxy CDN provider. Normal CDN providers (AWS CloudFront, Google Cloud CDN, etc.) only serve your static files (images, CSS, JS, etc.) from their servers.
However, reverse proxy CDN providers serve all your static files as well as dynamic HTML files from their CDN. This capability offers some additional advantages over any normal CDN provider by making pages load significantly faster.
QUIC.cloud vs Cloudflare
With the arrival of LiteSpeed's QUIC.cloud CDN, many QUIC.cloud vs Cloudflare comparisons have been written, so I will go over the differences, which although there are not too many, the existing ones are noteworthy.
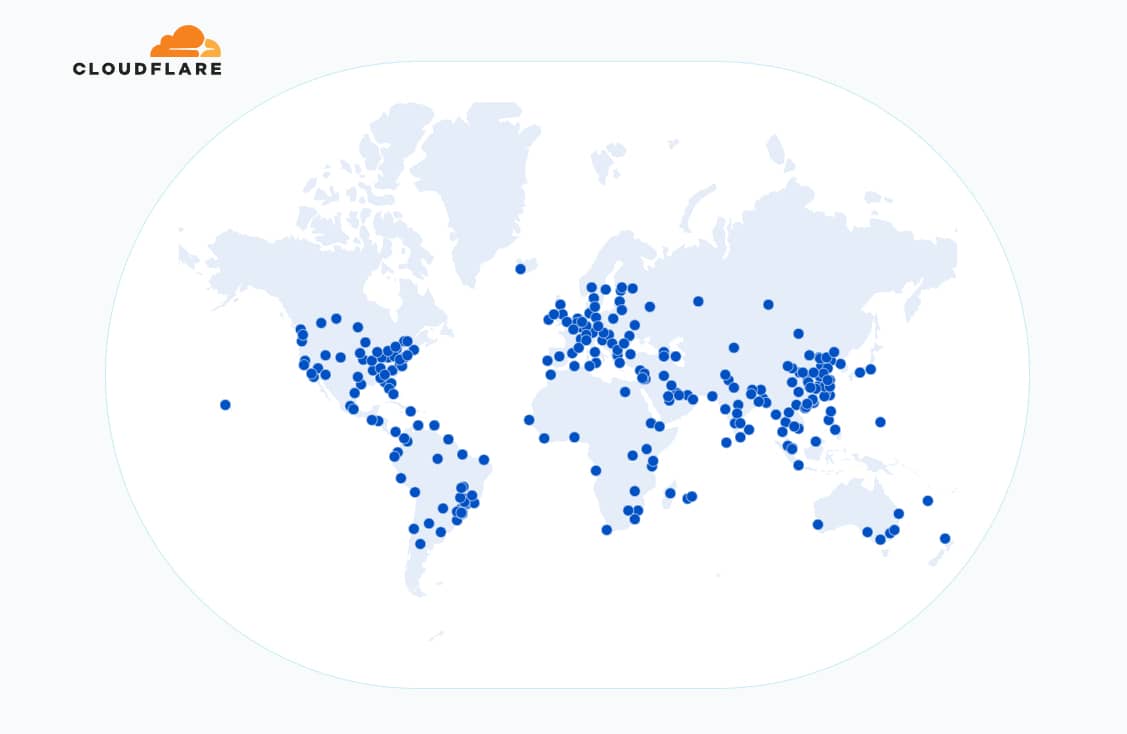
To sum up, Cloudflare clearly wins in the number of PoP locations.

QUIC.cloud currently has 70 PoPs in 8 regions, while Cloudflare has points in 250 cities in more than 100 countries, including mainland China, covering almost 95% of the globe and very good latency.
Where QUIC.cloud scores points is in its performance for WordPress thanks to the server integration with the LiteSpeed Cache plugin and the other free optimisation services it offers.
Requirements
Obviously you must have WordPress installed and, as you will have deduced, to use QUIC.cloud CDN you must have your site hosted on a hosting with LiteSpeed servers and their cache plugin installed.
If so, you will also have free credits to use their CDN, which may be enough if your traffic is not very high. As with most other services of this type, the credits to extend them in case you need more are quite cheap.
Before we get down to business, this tool allows you to check if your domain supports QUIC and HTTP/3.
Configure CDN

To start, you have to request the key from the Litespeed Cache Plugin.
After waiting a few minutes, when you refresh, the message that the request has been approved will appear at the top.
Now, clicking on the "Link to Quic Cloud" button in the first image will take you to create an account. If you don't have one you should create one.

Once logged in with your new Quic.Cloud account you will be redirected to the LiteSpeed Cache plugin where you will see that the orange button will now be green and will take you directly to the administration area.
Click there.

Lo primero que verásThe first thing you will see is the panel with your domain already linked, click on it.

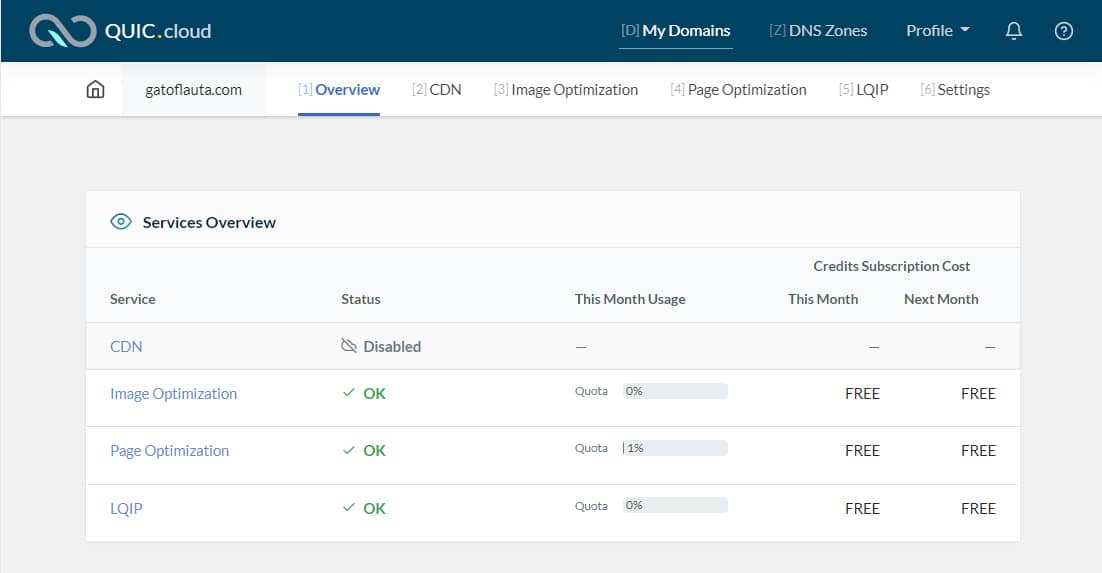
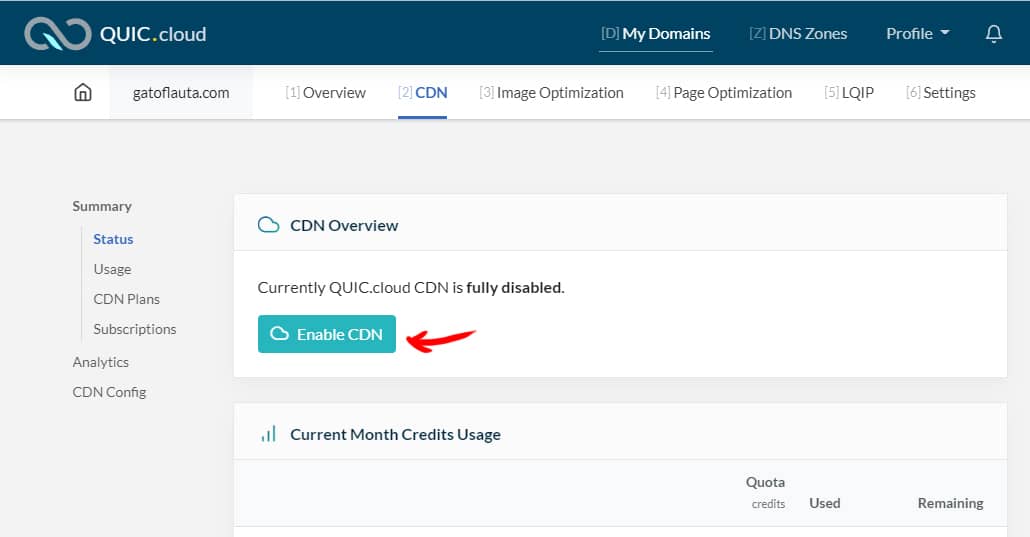
The CDN will appear at the top of the list of services with the status set to "Disabled", we click there
Now we will see the CDN activation button, but it cannot be clicked to activate it.

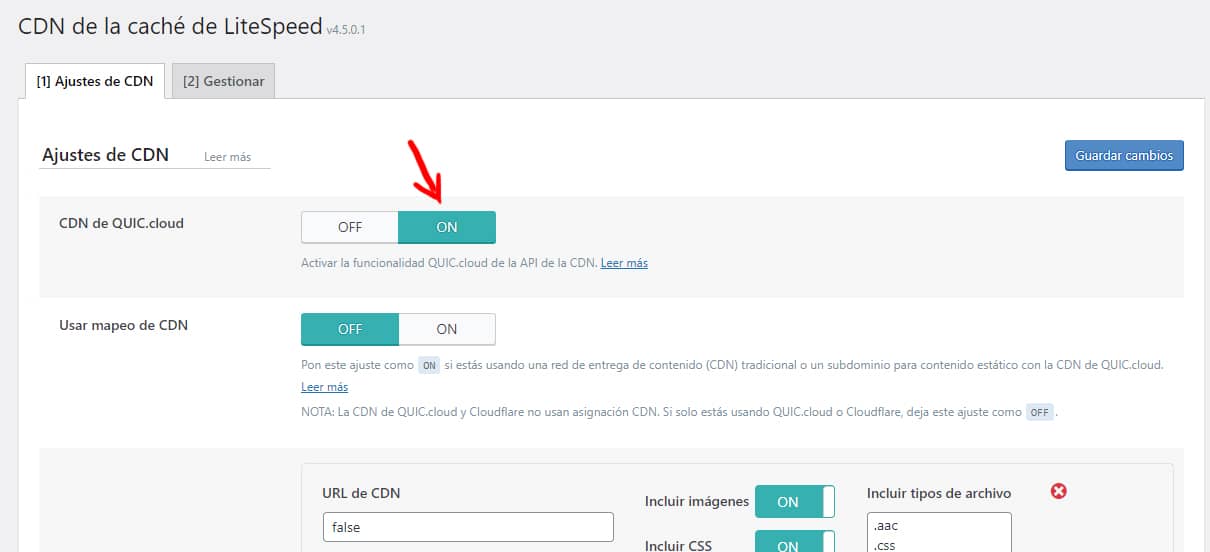
To activate it, we have to go back to our LiteSpeed Caché plugin and do it from there. We mark ON and the changes are saved.
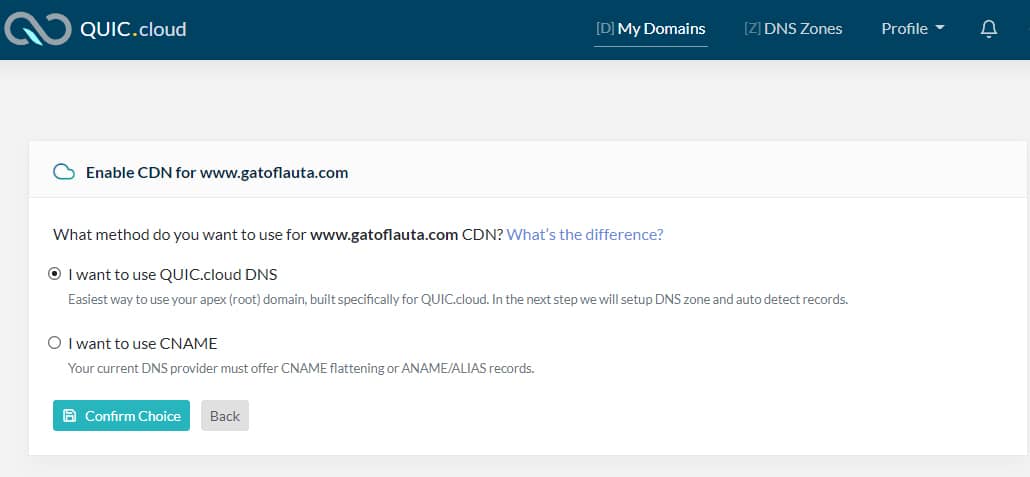
You go back to the Quic.cloud panel and it will let you activate it. You activate it.
We choose the first option: "I want to use QUIC.cloud DNS". This is the easiest and fastest way to use your main (root) domain.
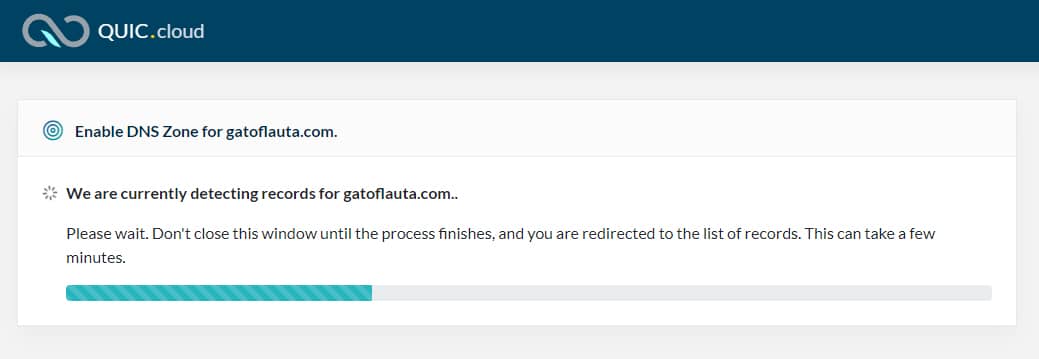
In the next step, after clicking on "Confirm Choice" and waiting a little while, the DNS zone will be generated and configured. If you need to, you can then edit it, delete it, add new records, etc.
The records will be automatically detected and a list similar to this one will be displayed.
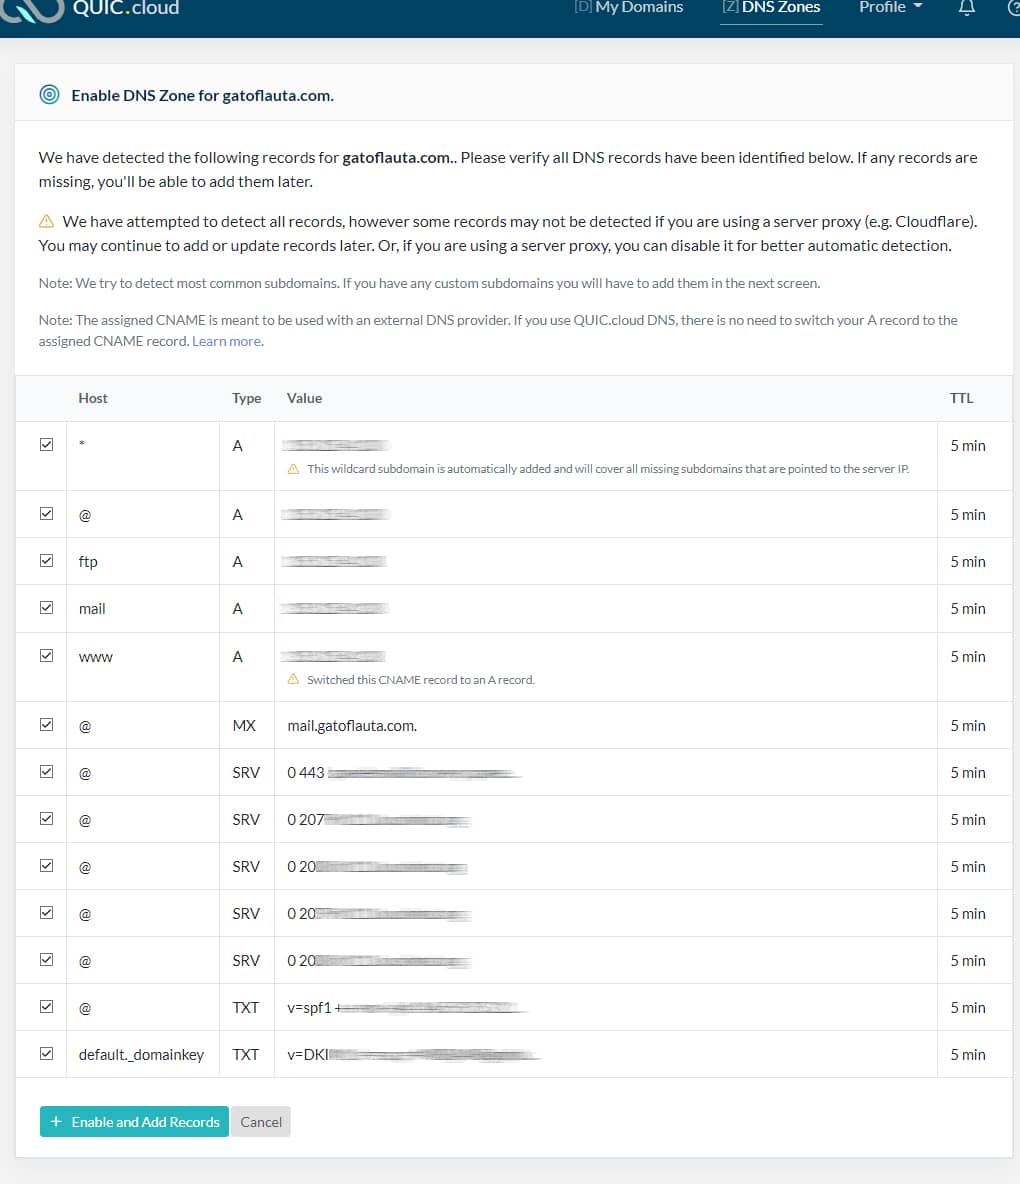
We make our selection and click on the green "+ Enable and Add Records" button.
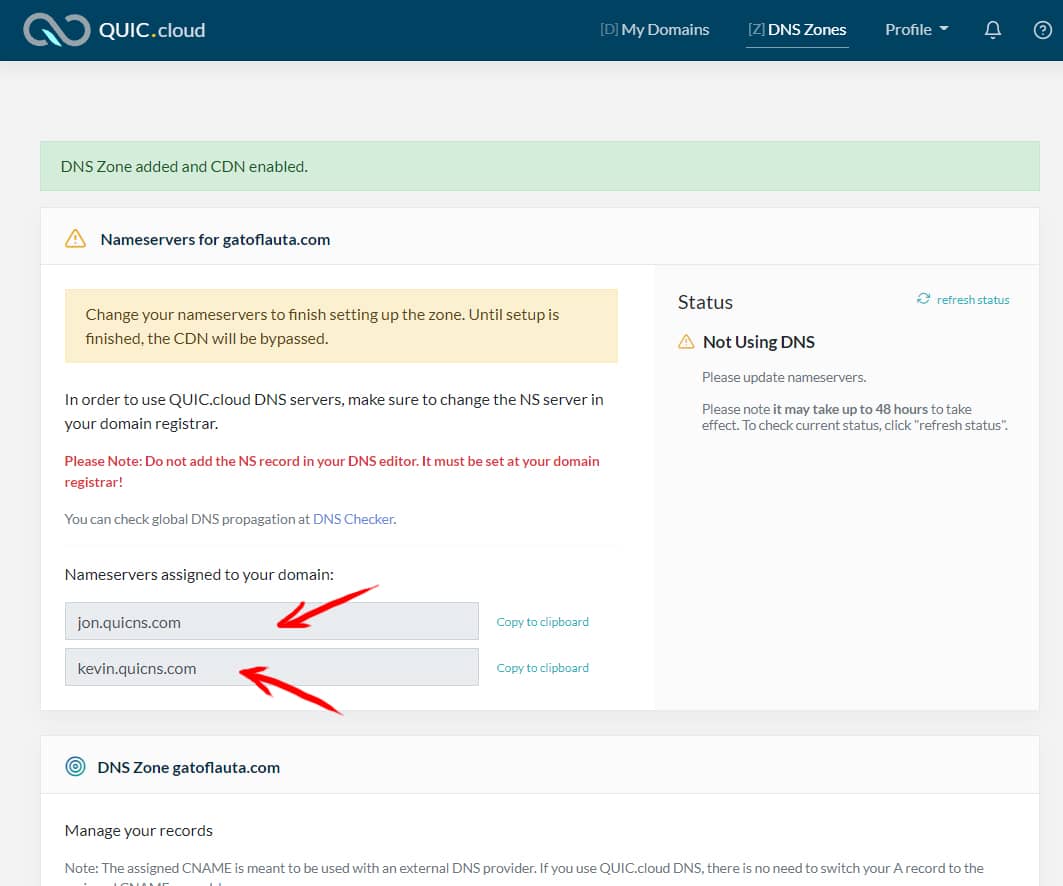
The QUIC.cloud Nameservers are generated and assigned, which you must now put in place of the ones you have in your domain.
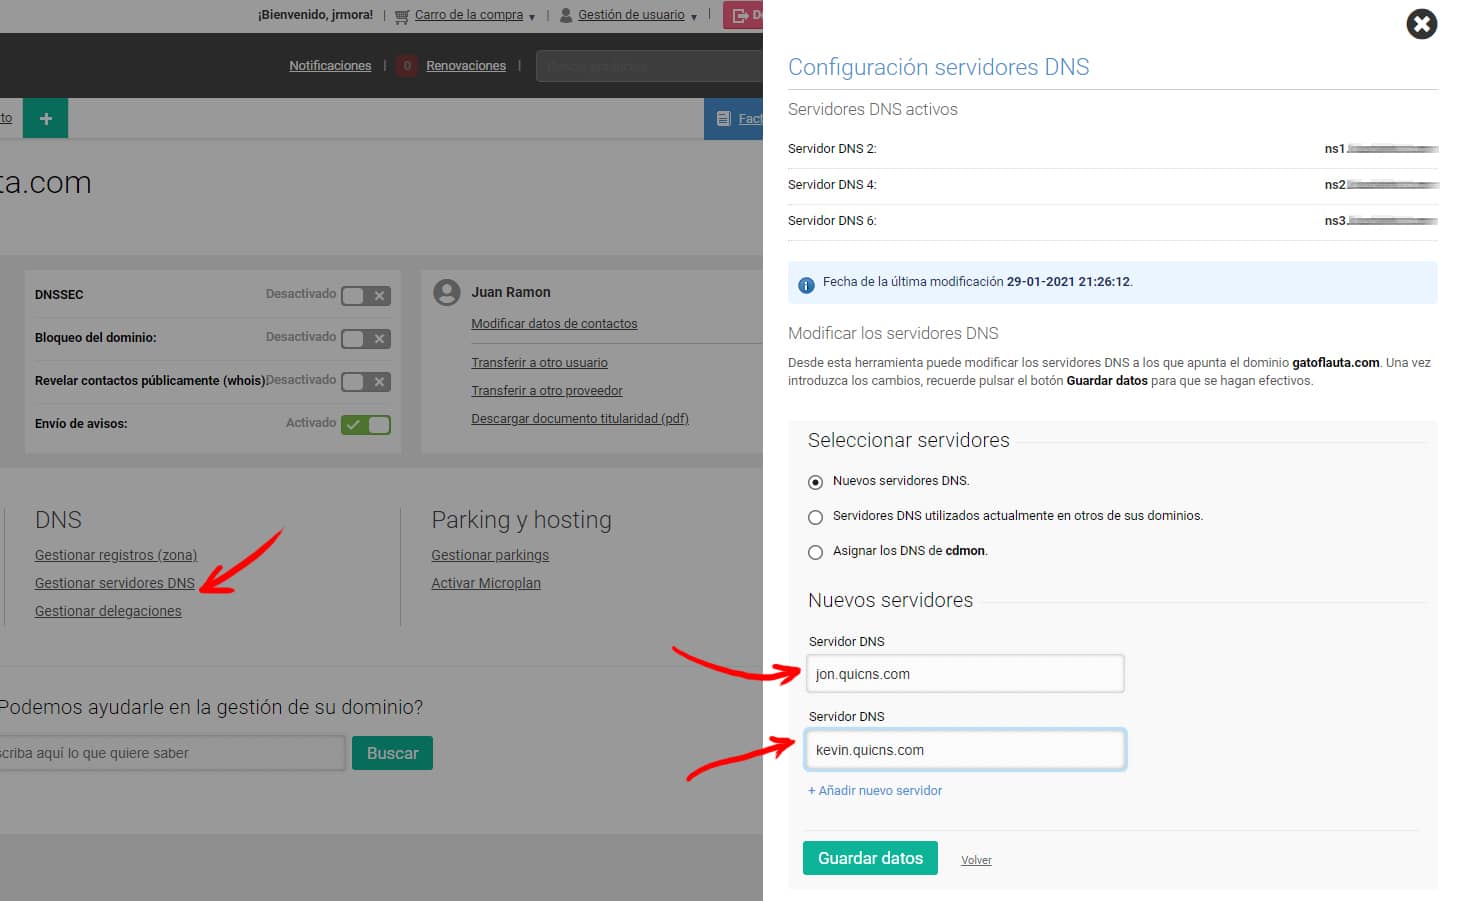
To do this, you must go to your provider, where you bought the domain, and go to the DNS management zone and add the new nameservers provided by QUIC.clod.
In the example in the image, the DNS change in CDMon.
Now you have to wait approximately 24 hours until they propagate completely, this time varies according to each provider and network circumstances.
When you return to your QUIC.cloud panel and refresh you will find that the CDN is already verified and active, but with a warning that the certificate is not yet recognisable and a message with a countdown.

We wait this time and it is assumed that when it recognises the certificate everything will be ready and your blog will have the CDN in use. When refreshing you should see it like this:

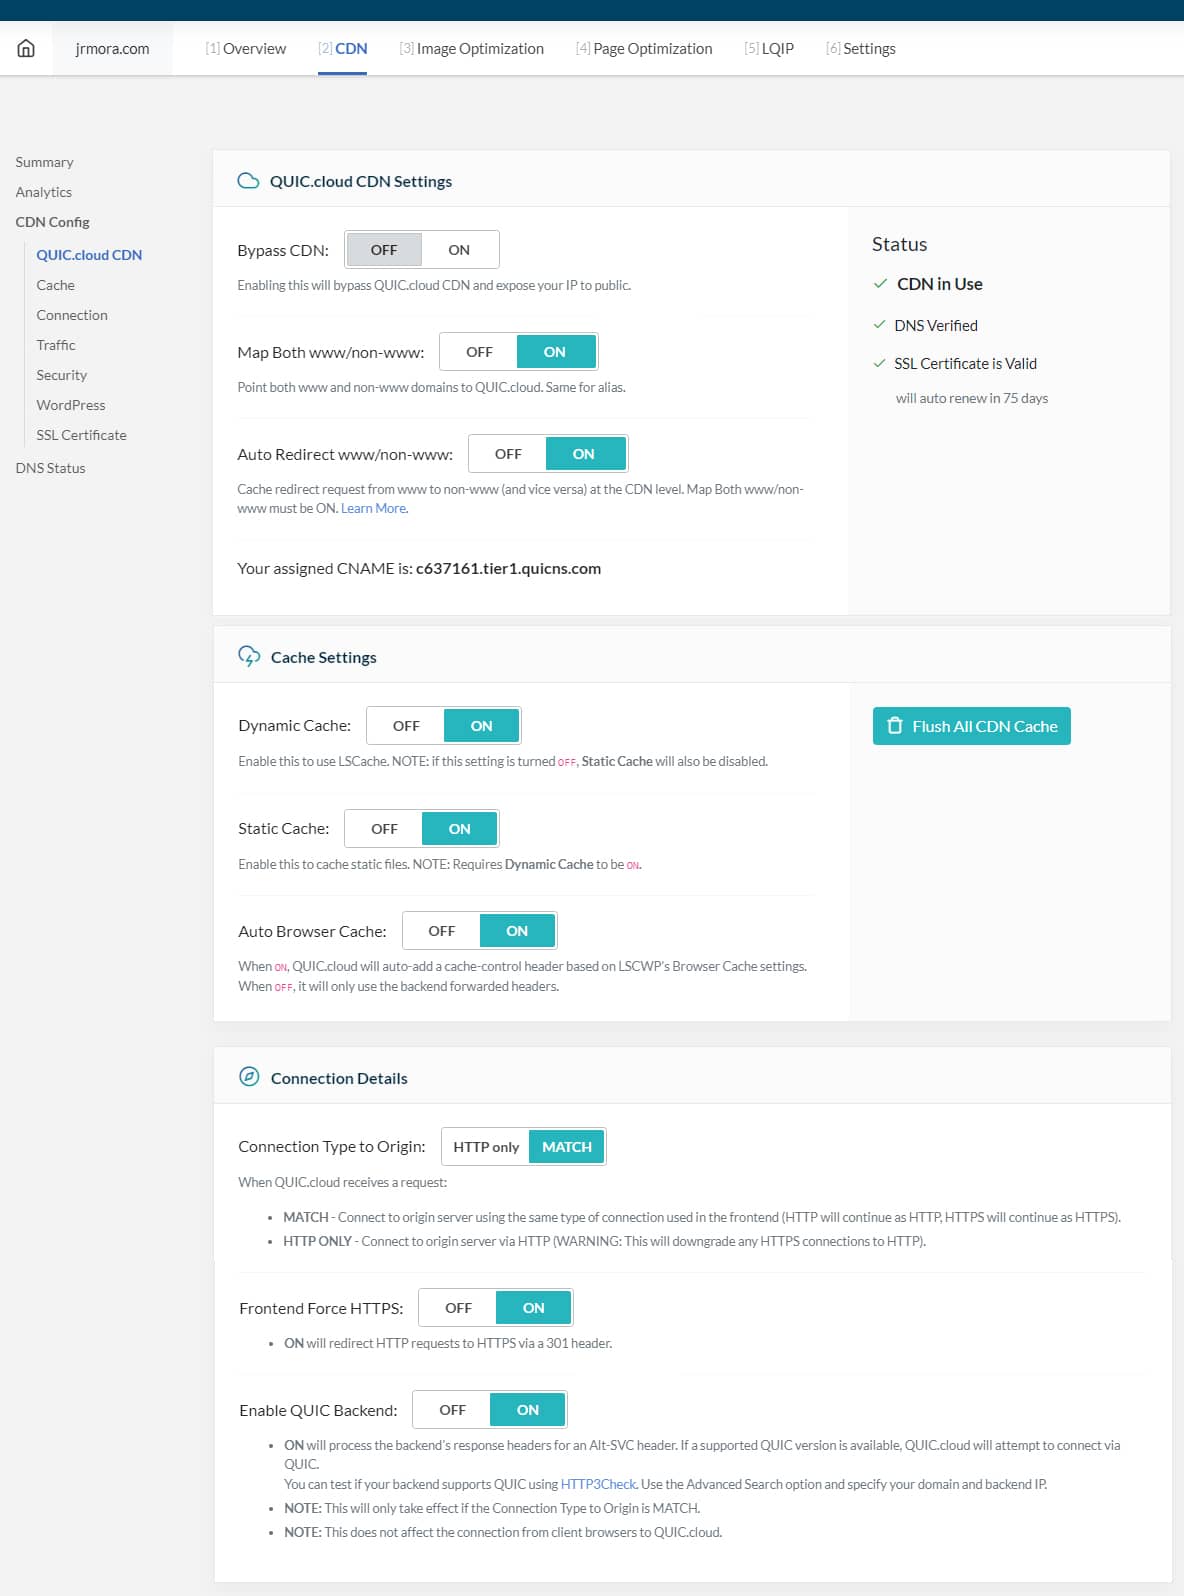
Now you just need to configure a few options in "CDN Config" in the left menu. These are the basic ones for the normal operation of the CDN, the rest you can configure as you wish.
Verify the functioning of the CDN
Finally, when you check that the DNS have been propagated (you can follow the evolution of the propagation here) you only have to verify that the CDN is active and doing its job. To make sure that everything is as it should be, enter the URL of your domain in this LiteSpeed checker and you should see something like this:
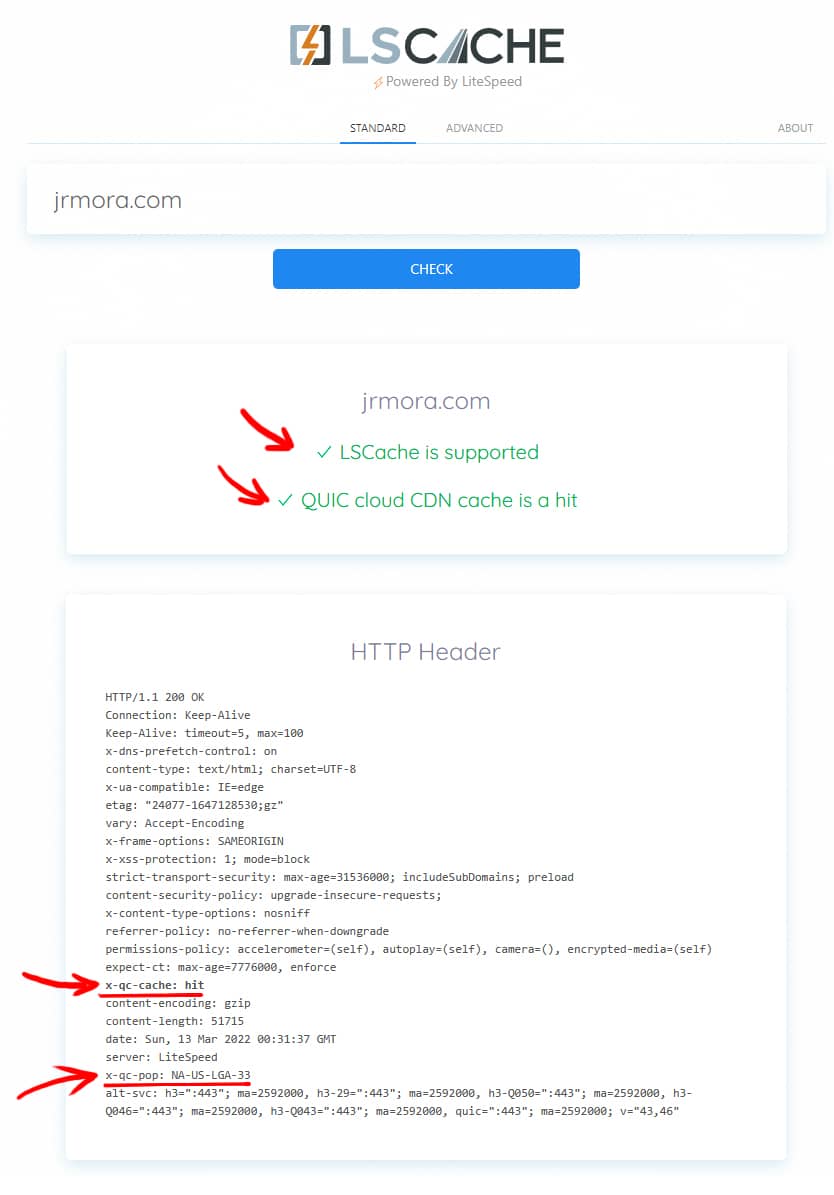
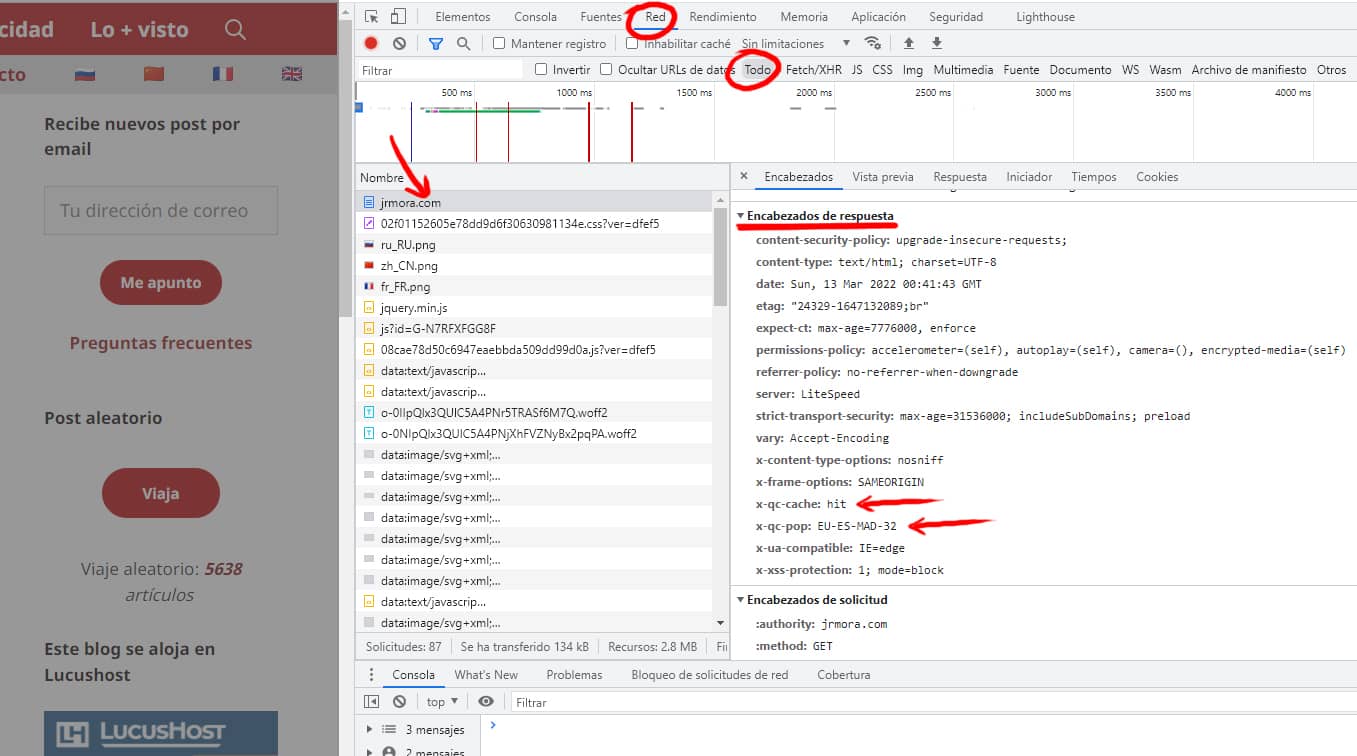
You can also check the headers for x-qc-cache:hit and x-qc-pop: NA-US-LGA-33 (or other number) with your browser's code inspector (Ctrl + Shift + C) and by looking under Network/All in the domain.